DevExpress の ASPxScheduler での「月」ビューの「詳細」ボタンタイトル設定のサンプルです。
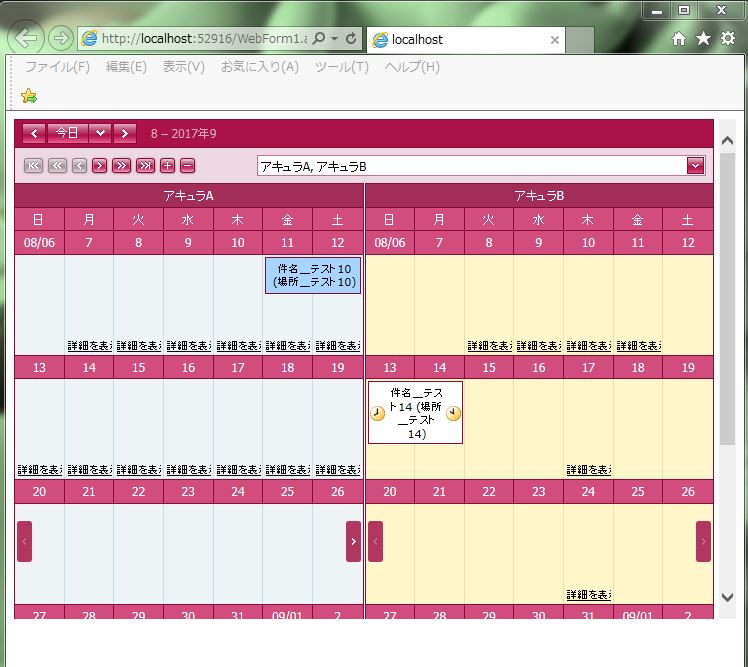
現状の画面デザインはこのようになっています。
<「月」ビューの「詳細」ボタンタイトル設定>
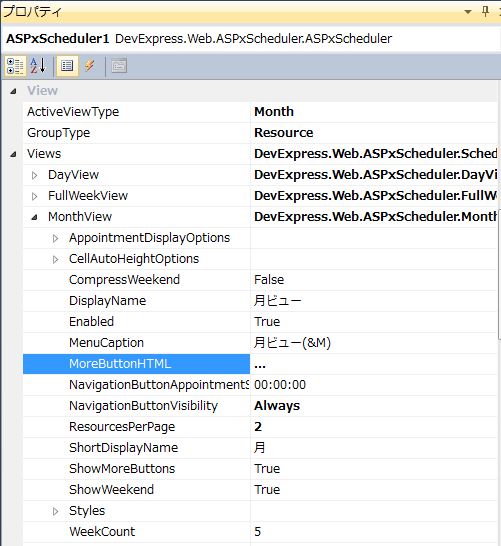
・「MonthView」に「MoreButtonHTML=”…”」を設定します。
【サンプルプログラム】
|
1 2 3 4 5 6 7 8 9 10 11 12 13 14 15 16 17 18 19 20 21 22 23 24 25 26 27 28 29 30 31 32 33 34 35 36 37 38 39 40 41 42 43 44 45 46 47 48 49 50 51 52 53 54 55 56 57 58 59 60 61 62 63 64 65 66 67 68 69 70 71 72 73 |
<form id="form1" runat="server"> <div style="height:500px; overflow:auto;"> <dxwschs:ASPxScheduler ID="ASPxScheduler1" runat="server" AppointmentDataSourceID="XpoDataSource2" ClientIDMode="AutoID" ResourceDataSourceID="XpoDataSource1" Start="2017-08-08" Theme="RedWine" Width="700px" GroupType="Resource" ActiveViewType="Month"> <Storage> <Appointments AutoRetrieveId="True"> <Mappings AllDay="ALLDAY" AppointmentId="ID" Description="DESCRIPTION" End="ENDDATE" Label="LABEL" Location="LOCATION" RecurrenceInfo="RECURRENCEINFO" ReminderInfo="REMINDERINFO" ResourceId="RESOURCEID" Start="STARTDATE" Status="STATUS" Subject="SUBJECT" Type="TYPE" /> <statuses> <dxwschs:AppointmentStatus Color="White" DisplayName="使用予定" MenuCaption="使用予定(&F)" Type="Free" /> <dxwschs:AppointmentStatus Color="99, 198, 76" DisplayName="使用中" MenuCaption="使用中 (&T)" Type="Tentative" /> <dxwschs:AppointmentStatus Color="74, 135, 226" DisplayName="使用完了" MenuCaption="使用完了(&B)" Type="Busy" /> <dxwschs:AppointmentStatus Color="217, 83, 83" DisplayName="使用キャンセル" MenuCaption="使用キャンセル(&O)" Type="OutOfOffice" /> </statuses> <labels> <dxwschs:AppointmentLabel Color="Window" DisplayName="なし" MenuCaption="なし(&N)" /> <dxwschs:AppointmentLabel Color="255, 194, 190" DisplayName="重要度_大" MenuCaption="重要度_大(&I)" /> <dxwschs:AppointmentLabel Color="168, 213, 255" DisplayName="重要度_中" MenuCaption="重要度_中(&B)" /> <dxwschs:AppointmentLabel Color="193, 244, 156" DisplayName="重要度_小" MenuCaption="重要度_小(&P)" /> </labels> </Appointments> <Resources> <Mappings Caption="NAME" ResourceId="ID" /> </Resources> </Storage> <Views> <DayView Enabled="False" > <TimeRulers> <cc1:TimeRuler></cc1:TimeRuler> </TimeRulers> </DayView> <WorkWeekView Enabled="False"> <TimeRulers> <cc1:TimeRuler></cc1:TimeRuler> </TimeRulers> </WorkWeekView> <WeekView Enabled="False"> </WeekView> <MonthView ResourcesPerPage="2" NavigationButtonVisibility="Always" MoreButtonHTML="..."> </MonthView> <TimelineView Enabled="False"> </TimelineView> <FullWeekView> <TimeRulers> <cc1:TimeRuler></cc1:TimeRuler> </TimeRulers> </FullWeekView> </Views> <OptionsBehavior ShowViewSelector="False" /> </dxwschs:ASPxScheduler> </div> <div> <dx:XpoDataSource ID="XpoDataSource1" runat="server" TypeName="Sample_10.SAMPLE.SCHEDULE_MST"> </dx:XpoDataSource> <dx:XpoDataSource ID="XpoDataSource2" runat="server" TypeName="Sample_10.SAMPLE.SCHEDULE_INFO"> </dx:XpoDataSource> </div> </form> |
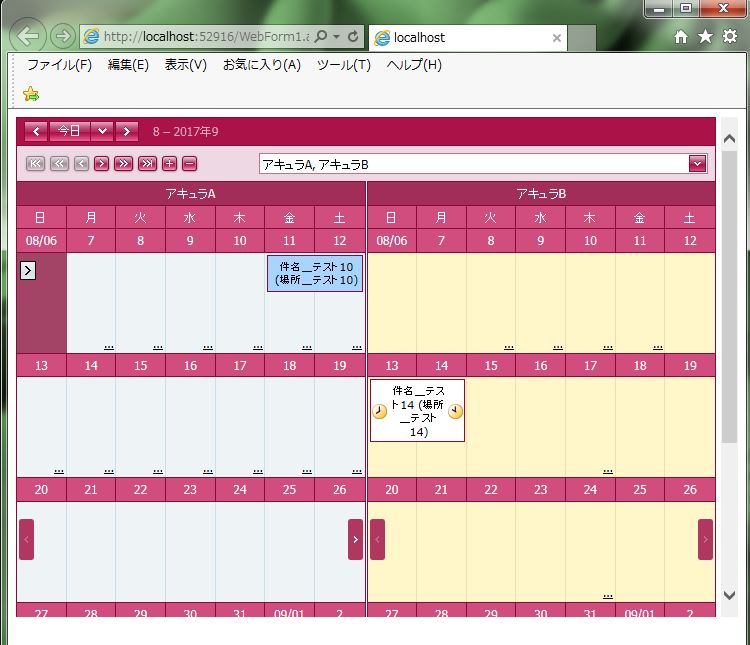
それでは、実行して動作確認を行います。
↓
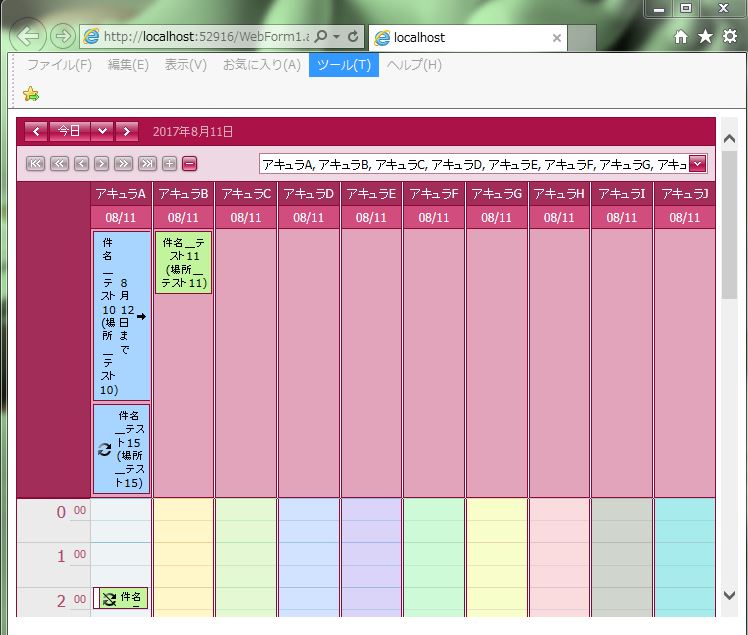
「…」クリックで「日」ビューへ移動
無事にスケジュールの「月」ビューの「詳細」ボタンタイトル設定が出来ました。


